
Top 10 Veterinary Otoscopes for Vets and Clinics

A Veterinary Otoscope is a small instrument with a big clinical job: helping practitioners inspect the ear canal and eardrum under controlled light. For a clinic, the right choice affects visibility, handling, cleaning, and the ease of examining a restless patient. Small details matter. A narrow speculum, a dim light, or a bulky handle can make an exam harder than it needs to be.

The need is not niche. A peer-reviewed UK primary-care study by O’Neill and colleagues reported that 10.2% of dogs had otitis externa during the study period. That figure describes one population, not every clinic, but it shows why dependable ear examination tools matter. Veterinary dermatologist Dr. Sue Paterson’s clinical work emphasizes careful assessment alongside appropriate diagnostic testing. In paraphrase, her practical lesson is: “Seeing the canal is only part of diagnosing ear disease.” This is a paraphrase, not a verbatim quotation.

This guide compares ten veterinary otoscopes for vets and clinics, focusing on illumination, magnification, speculum options, durability, and everyday usability. It also considers where video features may help—and where they may add cost without improving a particular workflow. No single model suits every practice. A busy general clinic and a specialist service may value different things. Weigh the instrument against your patients, examination space, and maintenance routine. Then choose with care. A ranking can guide a purchase, but hands-on testing and clinical judgment still matter.
Top 10 Veterinary Otoscopes for Vets and Clinics

Understanding Veterinary Otoscopes and Their Clinical Role

A veterinary otoscope helps clinicians inspect the external ear canal using focused light and magnification. It can reveal redness, swelling, wax, discharge, parasites, or foreign material. In dogs and cats, the canal bends, so a calm examination and suitable speculum size matter. The instrument supports assessment; it does not confirm every diagnosis. A normal-looking opening may still hide deeper disease.

Findings should be interpreted alongside the animal’s history, comfort, and other examination results. Pain, heavy debris, or a narrow canal can limit visibility. Do not force the speculum when the patient resists. The eardrum may not be visible, and that limitation should be recorded rather than guessed around. Depending on the case, sampling or further examination may be needed. Small details matter.

Tips: Check the light before use, select a clean speculum, and stabilize the patient gently. Compare both ears. Note what you can see, and what you cannot. Disinfect reusable equipment according to clinic protocol. Even experienced clinicians can miss subtle changes; a second look can help.

Key Features to Evaluate Before Comparing Otoscopes

Before comparing veterinary otoscopes, assess illumination, magnification, and speculum options. A narrow canal or heavy wax can quickly limit visibility. Check whether the light stays even at different angles, and whether the lens provides a clear view without awkward positioning. Small details matter. Specula should fit the patients you see, feel secure during use, and be easy to clean between examinations. A camera attachment may help document findings, but only if images remain sharp under clinic lighting.

The need for reliable ear examinations is reflected in published practice data. A VetCompass analysis of 22,333 dogs attending English primary-care practices reported a 10.2% annual prevalence of otitis externa (O’Neill et al., PLOS ONE, 2014). That figure concerns dogs in a specific setting, not every species or clinic. Still, it makes visibility and practical handling worth close attention. Compare weight, grip, power source, and the availability of replacement specula. Test the scope during a realistic examination, not just under showroom conditions. One limitation is easy to overlook: even a bright, high-magnification instrument cannot compensate for poor positioning or a patient that needs a gentler approach.

Top 10 Veterinary Otoscopes for Vets and Clinics – Key Features to Evaluate Before Comparing Otoscopes

Otosc ope Type Illumination Viewing Method Power Specula and Fit Key Advantage Consideration Typical Use
1. Standard LED Diagnostic Otoscope LED; output and color characteristics vary by model Direct viewing through a magnifying lens; commonly around 2.5× magnification Replaceable batteries or rechargeable handle, depending on design Usually accepts compatible reusable or single-use specula in several diameters Bright, practical choice for routine ear examinations Check brightness control, lens clarity, and availability of veterinary-appropriate specula General examinations in clinics and practices
2. Compact Pocket Otoscope LED or conventional lamp, depending on model Direct viewing, typically with a built-in magnifying lens Usually battery-powered with a compact handle Speculum sizes and attachment compatibility vary; confirm before purchase Lightweight and easy to carry for mobile or field visits Smaller handle and power source may be less convenient for prolonged use House calls, farm calls, and backup kits
3. Rechargeable LED Otoscope LED; may offer adjustable intensity Direct viewing with a magnifying lens Built-in rechargeable battery or rechargeable handle system Check whether the chosen handle accepts the clinic’s preferred specula Reduces routine disposable-battery replacement when charging is managed well Requires a charging routine; battery runtime and replacement options are model-specific Regular use in a fixed clinic or examination room
4. Fiber-Optic Otoscope Light is delivered through fiber optics around the viewing path Direct viewing through a magnifying lens; design-dependent magnification Battery-powered or rechargeable, depending on handle Verify speculum fit and the availability of suitable diameters Illumination around the viewing area can help keep the field less obstructed by the lamp position Performance depends on the light source and optical design; inspect the view before buying Routine examinations where clear, evenly distributed light is a priority
5. Halogen-Lamp Otoscope Halogen lamp; lamp output changes as the lamp ages Direct viewing with a magnifying lens Typically uses replaceable batteries or a rechargeable handle Compatibility depends on the instrument’s speculum mount A familiar conventional configuration with straightforward direct viewing Lamp replacement and heat generation may be relevant; compare with LED options Practices already equipped for conventional lamp-based instruments
6. Wide-View Otoscope Usually LED or fiber-optic illumination Wider viewing field than many standard designs; exact field depends on optics Battery-powered or rechargeable Confirm that available specula fit the instrument and the patient’s ear canal Can make orientation and visualization easier when the canal allows a broader view A wider field does not replace appropriate speculum selection or careful examination technique General veterinary examinations across a range of patient sizes
7. Pneumatic Otoscope LED or conventional lamp, depending on model Direct viewing with a sealed speculum connection and insufflation port Battery-powered or rechargeable; some setups use a separate bulb Requires a suitable seal and compatible speculum for pressure testing Allows gentle pneumatic assessment when clinically indicated Pressure should be used only when appropriate; it is not needed for every veterinary ear examination Targeted examinations where pneumatic assessment is part of the clinical plan
8. Video Otoscope with Display Integrated LED illumination is common; specifications vary Camera view shown on an integrated or connected screen Rechargeable or mains-powered system, depending on configuration Check the scope diameter, working length, and supplied patient-contact tips Supports shared viewing, teaching, and documentation when recording is available Image quality, storage, cleaning instructions, and service support vary substantially Clinics that need visual records or collaborative examination
9. Smartphone-Connected Video Otoscope Usually integrated LED illumination Camera image displayed on a compatible phone or tablet May draw power from the device or use a separate rechargeable battery Confirm tip size, device compatibility, and whether tips are reusable or single-use Portable image sharing and capture may be convenient for mobile workflows Depends on app compatibility, connection stability, device handling, and data-privacy practices Mobile consultations, client education, and image documentation
10. Interchangeable-Speculum Otoscope System LED, fiber-optic, or lamp-based, depending on the selected instrument Direct viewing; magnification and field of view vary by model Battery-powered or rechargeable system Designed to use a range of compatible speculum diameters; verify the size range and attachment system Offers flexibility for different patient sizes and ear-canal access needs Additional specula require appropriate cleaning, storage, and inventory management Clinics examining a varied caseload, from small patients to larger animals

Comparison note: These entries describe common otoscope configurations, not specific products. Actual illumination, magnification, battery life, speculum compatibility, and recording features vary by model. Select a speculum size appropriate for the patient and follow the instrument’s cleaning and clinical-use instructions.

Top 10 Veterinary Otoscopes for Vets and Clinics

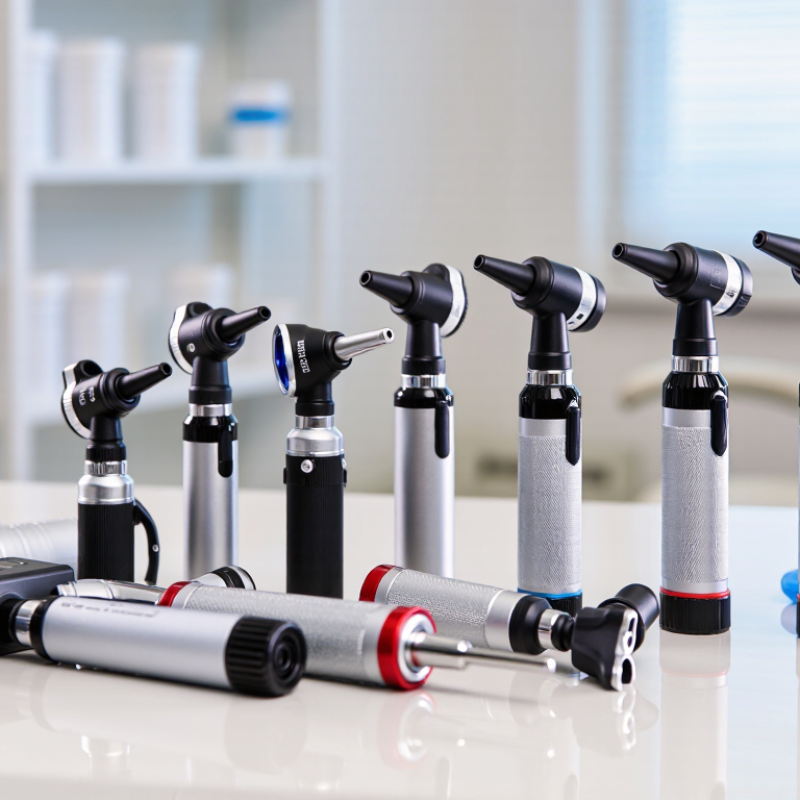
Veterinary otoscopes differ in illumination, viewing angle, handling, and cleaning needs. A useful comparison includes ten practical designs: standard LED, fiber-optic, rechargeable, pocket-sized, wide-view, video-enabled, sealed-head, interchangeable-speculum, compact small-animal, and rugged clinic models. These are options to assess, not a universal ranking. A bright beam can reveal redness or debris, but glare may obscure detail. Light matters.

For routine examinations, a lightweight model can reduce hand fatigue during a busy clinic day. Wide-view designs may help when positioning a restless patient, while video models can support documentation when used with appropriate consent and clinic procedures. Rechargeable units avoid frequent battery changes, though charging routines can be easy to overlook. Not always ideal. Check whether the handle feels secure with gloves and whether the controls are easy to reach.

Speculum size and fit deserve close attention. A small opening may suit a narrow ear canal, but forcing an instrument can cause pain or injury. Use a clean, suitable speculum for each patient, and follow the device’s cleaning instructions. An otoscope helps visualize the canal; it does not replace a full examination or clinical judgment. Build quality, repair options, and staff training also affect long-term value. The best choice depends on the patients seen most often, the examination setting, and the clinician’s experience. A cheaper model may work well, but poor illumination can make careful assessment harder.

How Otoscope Designs Suit Different Veterinary Settings

Veterinary otoscopes need to fit the work, not just the treatment room. In a small-animal clinic, a lightweight handle and clear view can help during a brief ear check on a wiggling dog. Fit matters. A range of speculum sizes is useful for examining different patients, while a secure attachment helps prevent slips when an animal moves.

Farm and mixed-animal practices face different demands. Equipment may travel between rooms or outdoor exam areas, so a sturdy case and dependable illumination can be practical advantages. A wider viewing field may help when examining larger ear canals, but visibility still depends on positioning and patient cooperation. Bright light alone cannot make a difficult examination easy.

For busy clinics, rechargeable power can reduce interruptions, while replaceable batteries may suit settings without a convenient charging station. Smooth surfaces and removable specula make cleaning between patients more straightforward. Small details count. Clinicians should choose a design they can handle steadily and clean according to its instructions. Earwax, movement, and narrow canals can limit what the instrument reveals; findings should be considered alongside the patient’s symptoms and full examination. No single otoscope design suits every veterinary setting.

Choosing Veterinary Otoscope Designs for Different Settings

Approximate adult body-weight ranges across common veterinary patient groups (kg). The broad range of patients in general practice calls for a versatile selection of specula; smaller-patient settings benefit from appropriately sized options.

Ranges are approximate and vary by breed, age, and individual animal. Body weight is not a substitute for assessing ear anatomy or choosing a suitable speculum.

Choosing an Otoscope for Your Practice’s Needs

Choosing an otoscope for a veterinary practice starts with the patients you see most often. A small-animal clinic may need clear views of narrow ear canals, while a mixed practice may value interchangeable specula in several sizes. Consider who will use the instrument, how often it travels, and whether it must withstand frequent cleaning.

A practical test is to hold the otoscope during a simulated exam and check whether its weight feels balanced. Inspect the light on a dark surface, then look at a textured object through the lens. Brightness matters, but an overly intense beam can create glare. Small details matter. A secure speculum fit, simple controls, and a handle that is comfortable with gloves can make repeated exams easier. Check how the device is powered and whether replacement parts are readily available.

For a clinic comparing ten options, use the same checklist for each: image clarity, field of view, durability, cleaning requirements, and total cost of ownership. Ask staff members to try the controls; a feature that seems useful in a catalogue may be awkward in a busy room. No single model suits every workflow. It is easy to overvalue extra features, and I would reassess that choice after routine use. Keep the intended species and examination setting in view when reviewing specifications.

Go to Top