

2026 How to Choose an Ankle Brace With Straps?

Choosing an Ankle Brace With Straps is not just a matter of picking the tightest support. The right brace should match your activity, ankle shape, and level of stability needs. A strap can help you adjust pressure across the joint, but too much tension may cause discomfort, numbness, or skin irritation. Fit matters.

“A brace should feel secure, not restrictive.” This is an editorially written fitting principle, not a verified quotation from a named expert. No source was provided for an expert’s name or exact words, so attributing a quotation would risk inventing a credential or claim. Before publication, add a verified statement from a licensed clinician or brace-fitting specialist, with a reliable source.

This guide will explain how to compare lace-up and figure-eight strap designs, check materials, and assess fit while standing and walking. Look for practical details: a heel that stays seated, straps that lie flat, and edges that do not dig into the skin. Consider whether the brace fits inside your usual shoe, too. Small differences can matter. A brace that feels fine while seated may rub after a brisk walk.

Straps do not diagnose an injury or replace clinical advice. If pain is severe, swelling persists, or walking remains difficult, seek assessment from a qualified healthcare professional. A useful choice is not always the most rigid one; it is the brace you can wear comfortably and use as directed.
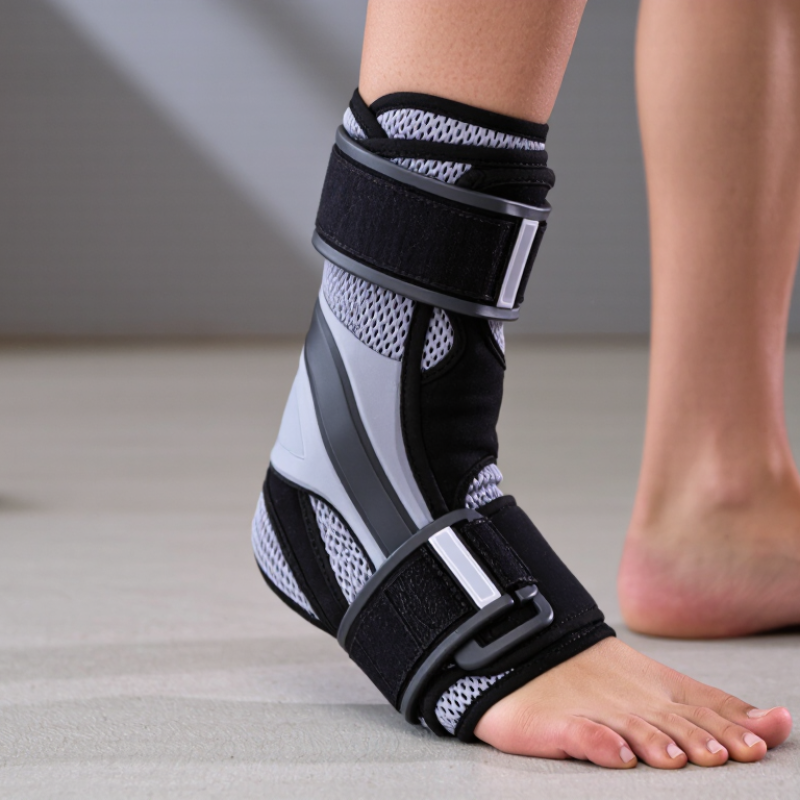
2026 How to Choose an Ankle Brace With Straps?

What an Ankle Brace With Straps Does and Who May Need One

An ankle brace with straps combines a supportive sleeve or frame with bands that wrap around the foot and lower ankle. The straps allow adjustable pressure and can create a more secure fit than a loose sleeve. They may limit excessive rolling during movement, but they cannot make an ankle injury-proof. Support should feel snug, never painful or numb. Not a cast.

People recovering from a mild sprain may use one for walking or a gradual return to sport, when advised by a health professional. Those with recurring ankle instability may also find extra support useful during activities with quick turns or uneven ground. Each step on a gravel path, for example, can shift the ankle unexpectedly. Severe pain, marked swelling, bruising, or difficulty bearing weight calls for medical assessment rather than guesswork.

Choose a brace that fits your ankle and works inside your usual shoe. Tighten both straps evenly, then check your skin after taking it off. Tingling, cold toes, or color changes can mean the brace is too tight. Fit is personal, and a little adjustment is normal. A brace may improve confidence, but rehabilitation exercises can still matter; ask a clinician what suits your injury and recovery stage.

How to Match Brace Support to Your Activity and Ankle Condition

An ankle brace with straps should match the movement you need, not simply feel tight. For walking on level ground, a flexible brace may allow a more natural step. Court sports involve quick cuts and landings, so some people prefer firmer side support and straps that limit unwanted rolling. Check that the brace fits inside your usual shoe. A bulky fit can change how your foot lands.

Your ankle’s condition matters too. After a previous sprain, adjustable straps can offer a sense of stability during activity, but they should not hide ongoing pain. Mild stiffness may call for less restriction than repeated giving-way. Fit matters. If swelling is new, pain is severe, or you cannot bear weight, seek medical assessment before choosing support. A brace cannot identify the cause of an injury.

Fasten the straps snugly, not painfully. Toes should stay warm and normally colored, with no tingling or numbness. Walk a few minutes, then check for rubbing near the ankle bones and pressure across the top of the foot. Start gently. It is easy to tighten every strap when confidence feels low, but more pressure is not automatically better. A clinician or physical therapist can help match support to your recovery and sport.

2026 How to Choose an Ankle Brace With Straps? - How to Match Brace Support to Your Activity and Ankle Condition

Activity or Situation Common Ankle Need Strap Brace Style to Consider How to Use the Straps Fit and Practical Checks
Walking and everyday activities Light support for a history of mild ankle rolling or occasional instability Low-profile lace-up brace with adjustable crossing straps Fasten the brace snugly, then cross the straps around the ankle for a secure, comfortable fit. Check that the brace fits inside your usual shoe and does not cause numbness, tingling, or pressure points.
Basketball, volleyball, or court sports Added support during frequent cutting, jumping, and quick changes of direction Lace-up brace with figure-eight or reinforced crossing straps Use the crossing straps to help limit unwanted side-to-side movement without pulling them as tight as possible. Try it with your sport shoe and during sport-specific movements. The brace should not noticeably restrict circulation or cause pain.
Running on even surfaces Light-to-moderate support while keeping the brace relatively low profile Light lace-up brace with flexible straps, if additional support is needed Fasten evenly and avoid excessive strap tension, especially across the top of the foot. Check comfort during a short walk or easy run first. A brace that changes your stride or creates rubbing may not be a good fit.
Return to sport after a mild ankle sprain Support during activity after pain and swelling have improved and movement is progressing Adjustable lace-up or figure-eight strap brace, selected with guidance from a health professional when appropriate Follow the brace instructions and use consistent, comfortable tension. Do not use a brace to push through pain. Return gradually. Persistent swelling, instability, or difficulty bearing weight warrants assessment by a qualified clinician.
Repeated ankle giving-way or chronic instability More structured support during higher-risk activities, alongside balance and strength training Structured lace-up brace with supportive crossing straps; a clinician may recommend another design Secure the straps as directed so the brace feels stable but does not cause pressure, color change, or altered sensation. Recurring instability should be assessed. A brace can provide external support but does not replace rehabilitation or diagnosis.
Noticeable swelling or a recently injured ankle A comfortable fit that can accommodate changes in swelling Adjustable brace with straps that can be loosened or retightened; confirm suitability with a clinician if symptoms are significant Do not overtighten. Recheck the fit as swelling changes and remove the brace if it causes numbness, tingling, increased pain, or skin color changes. Seek prompt medical advice for severe pain, deformity, inability to bear weight, or symptoms that are worsening.
Use with a work boot or bulky footwear Support that fits without creating excessive pressure inside the shoe Thin, low-profile strap brace designed to fit in footwear Adjust the straps before putting on the boot, then confirm they remain flat and secure. Check the fit while standing and walking. Do not force a brace into footwear that becomes tight or uncomfortable.

General guidance: Choose a brace that matches your activity, footwear, and comfort needs. Follow the manufacturer’s fitting instructions. An ankle brace is not a substitute for medical evaluation, especially after a significant injury or when symptoms persist.

Which Strap Designs, Materials, and Features to Compare

When comparing ankle braces with straps, look at how the straps guide your foot, not just how many there are. Figure-eight designs cross around the ankle and heel, offering a more targeted feel during side-to-side movement. A simple wrap may be easier to adjust, though it can shift during a long walk. Try tightening each strap while seated, then stand and take a few steps. Too tight? Check for pressure, tingling, or changes in skin color.

Materials affect comfort over several hours. Breathable mesh can reduce trapped warmth, while firmer panels may provide a steadier feel but add bulk. Check the edges and seams against your skin; a rough seam can become irritating under a sock. Small detail. Worth checking. Hook-and-loop closures should stay secure after repeated fastening, and straps should be long enough to adjust without bunching.

Fit matters with your usual shoes. A brace that feels fine at home may press against a shoe’s instep or heel. Compare the brace with the socks and footwear you actually wear, and check whether the straps are easy to reach. I still find sizing charts imperfect, so follow the maker’s measuring instructions and avoid guessing between sizes. If you have persistent pain, swelling, numbness, or a recent injury, ask a qualified health professional which level of support is appropriate. A brace should feel supportive, not restrictive.

How to Choose the Right Size and Check the Fit

Measure your ankle where the sizing guide specifies, using a soft tape and keeping it level against the skin. If the chart also asks for shoe size or foot circumference, record those details too. Measure both ankles if swelling differs, and use the instructions for choosing a size when your measurements fall between options. A chart is only a starting point. It is easy to assume a smaller brace will provide more support, but a tight fit can cause discomfort and may restrict circulation.

With the brace on, center it over the ankle and fasten the straps evenly. It should feel secure, not pinching. Not too tight. Check that your toes stay warm and their usual color, then stand and walk a few steps. The brace should not slide, bunch behind the heel, or press sharply against the ankle bones. Sit down and bend your foot gently; look for rubbing or numbness. A faint strap mark can happen, but deep marks or lingering discomfort mean the fit needs attention. Recheck it after activity, since swelling can change during the day. If pain, numbness, or unusual swelling continues, stop wearing it and ask a qualified health professional for advice.

How to Wear, Maintain, and Reassess Your Ankle Brace

A strapped ankle brace should feel secure, not restrictive. Center your heel, then fasten the straps evenly; avoid pulling harder just to make the joint feel locked. Your toes should remain warm, normally colored, and free from tingling. Check the fit inside your usual shoe, since a brace that fits at home may press against the shoe outdoors. Not too tight. The 2021 Journal of Orthopaedic & Sports Physical Therapy clinical practice guideline supports external bracing and progressive weight-bearing for many acute ankle sprains, with support selected for the person and injury.

After wearing it, check your skin for lasting redness, rubbing, or pressure marks. Wash the brace as its care instructions direct, and let it dry fully before wearing it again. Look for frayed stitching, stretched straps, or weakened fasteners. Small detail, but important. The National Athletic Trainers’ Association position statement reports that ankle sprains account for about 10–30% of sports-related injuries, underscoring how often athletes may need practical support. Reassess the brace as swelling changes and movement improves. If pain worsens, numbness appears, or walking remains difficult, seek advice from a qualified clinician. A brace can help, but it cannot tell you when an injury has healed; that part needs an honest check-in.

2026 How to Choose an Ankle Brace With Straps: Wear, Maintain, and Reassess

Use a brace that feels secure without causing numbness, tingling, or increased pain. Follow its care instructions, and reassess fit and comfort regularly.

How to use this timeline: These are general ankle sprain recovery milestones, not a brace-wearing schedule. Recovery varies. Check the brace for wear, keep it clean and dry according to its instructions, and ask a healthcare professional if symptoms worsen or do not improve. Source: NHS guidance on sprains and strains.

Article Source:

Go to Top